
Create Your Vision Board in Minutes: A Step-by-Step Guide
Building your dream vision board has never been easier. Follow our simple, step-by-step guide to bring your dreams to life, with intuitive tabs and helpful screenshots to guide you along the way. Whether you’re a first-timer or an experienced creator, you’ll have everything you need to design a board that truly reflects your goals and aspirations.
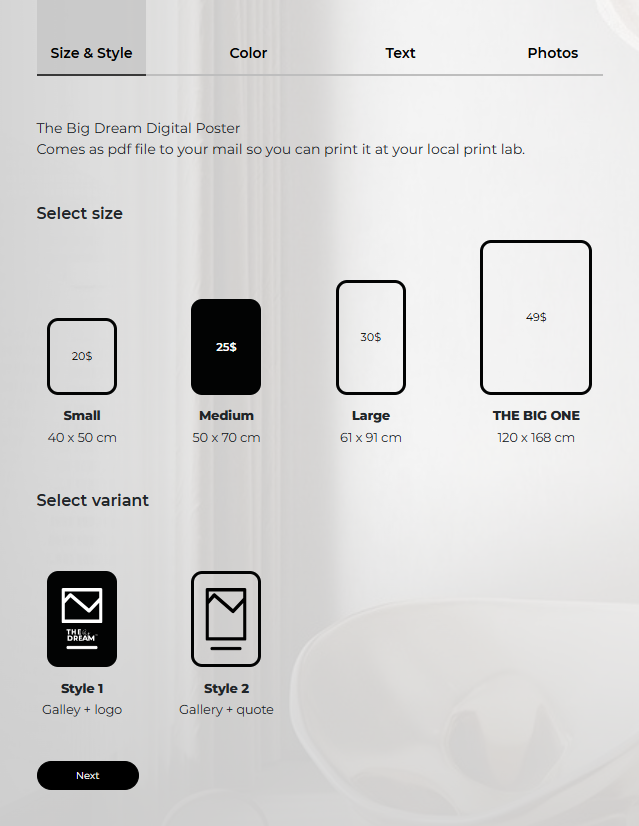
Step 1: choose size and style
Start by choosing the size that suits you best. Remember that you can always change it later! With our instant preview feature, you’ll get a quick look at how your vision board will change as you adjust the size.
- Small, Medium, and Large: These are your standard sizes, perfect for framing. You’ll find frames for these sizes easily in both local and online stores.
- The Big One: For those ready to go BIG – this size is ideal if you’re looking to print your vision board on glass or want to make a grand statement. Just keep in mind that it’s a little more challenging to find frames for this size, so make sure you’re ready for a bold display.
Next, choose your style:
- Style 1: Featuring the bold “THE BIG DREAM” in the center, with space for up to 28 photos.
- Style 2: Offers more space for photos, with room for up to 49 photos – perfect if you have more dreams to visualize!
Tip: You can always change your style or size later on, so feel free to experiment and find what resonates with you.
Sizes:
Small, Medium, Large, THE BIG ONE
Style 1:
Max 28 photos,
Motivational quote,
Up to 25 additional phrases
Style 2:
Max 49 photos,
Motivational quote,
Up to 50 additional phrases
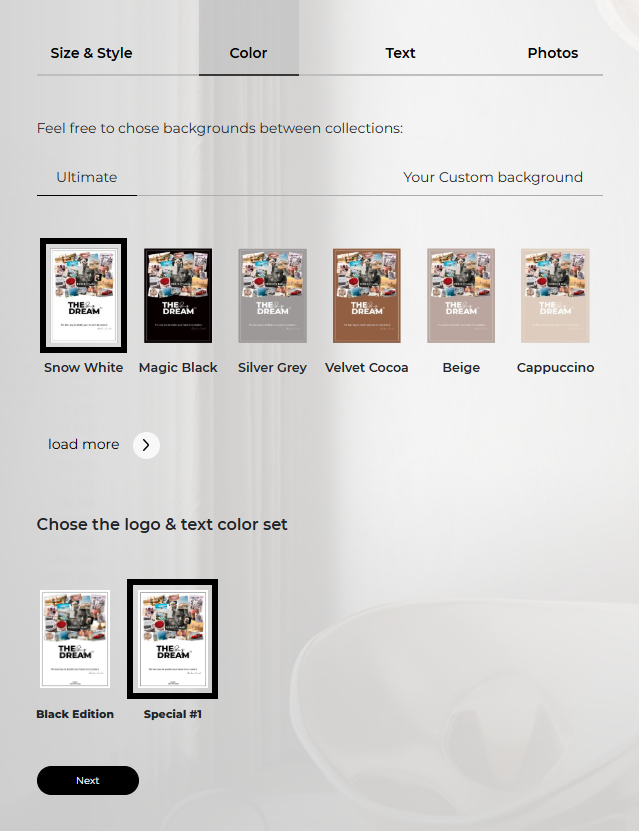
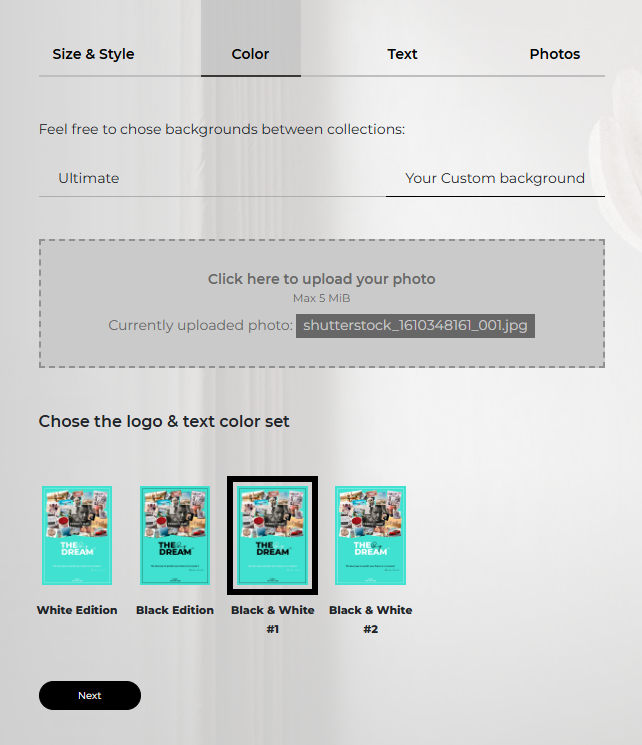
Step 2: CHOOSE THE COLOR OF THE BACKGROUND
Now it’s time to personalize the color scheme of your vision board!
- Background Color: Choose your favorite color for the background. The vibrant hues available will make your vision board stand out and reflect your unique style.
- Other Elements: We offer a mix of pre-designed templates for quotes, logos, and other text elements that contrast beautifully with your chosen background. Pick the color combinations that feel just right for you.
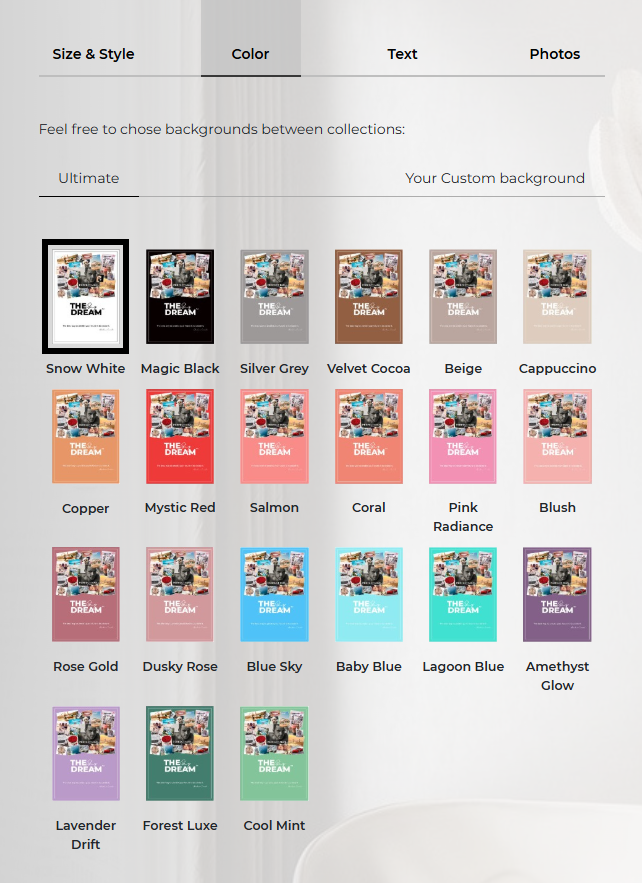
Collections Available:
- Ultimate Collection: A selection of timeless colors to suit any vision.
- Valentine Collection: Available only between January 14 and March 14, this collection is perfect for adding a touch of love and warmth to your vision.
- Custom Background: Upload your own background for full creative freedom.
Collections:
Ultimate, Valentine, Custom Background
Colors:
21 colors or color of your own uploaded background, graphics or photo (max 5MB file)
More options:
Additional features for your best friend or your loved ones
Discover More:
Click on “Load More” to explore additional colors and unique options perfect for creating a vision board for yourself, your best friend, or your loved ones.
Now you can explore all 21 color options. If none of them resonate with you, feel free to upload your own custom background (up to 5MB). Whether it’s a graphic or another photo, the choice is yours. As promised, everything is fully customizable.
Step 3: CHOOSE your favorite quote and set a date for action
Now it’s time to inspire and motivate yourself!
- Choose Your Quote: Add your favorite motivational quote or any meaningful text that speaks to your journey. Whether it’s a phrase that lifts you up or a saying that keeps you grounded, this is your space to personalize and fuel your dreams.
- No Quote in Mind? No problem! We’ve curated a list of 100 super powerful quotes to inspire you. Simply pick the one that resonates the most with your current vision.
Set Your Action Plan:
To turn your dreams into reality, don’t just visualize – take action!
You can also include the place you live now or the place where you wish to live in the future. Next, set a target date for achieving your goals. This simple yet powerful step transforms your vision from intention into tangible steps toward success.
Feel free to leave these two fields blank if you prefer. It’s entirely up to you!
Quotes or Dedication:
Write your own quote or decidation
Select one of 100 powerful quotes that we’ve prepared for you
Place:
Write place where you live or maybe want to live in the future or leave it blank
Date:
Set the date for your action or leave it blank
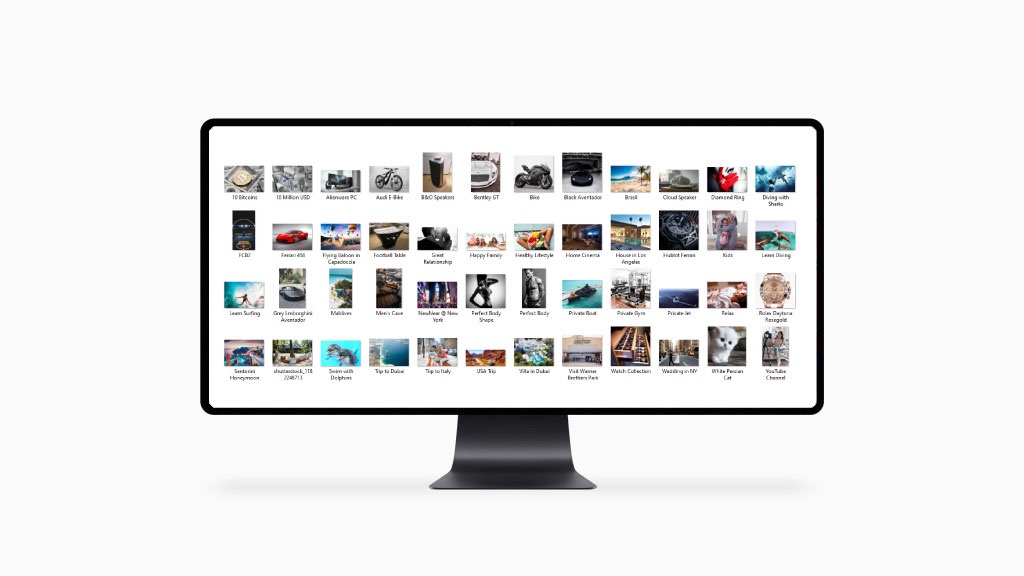
Step 4: ADD YOUR PHOTOS
It’s time to bring your vision board to life with your favorite photos!
- Upload Photos: You can easily upload photos from your device. To find the best images, we recommend platforms like Pinterest or Instagram, both filled with beautiful, inspiring photos, or any other platform you prefer.
- Built-in Database: For convenience, you can also use our built-in photo database powered by PEXELS. Simply type in a description of the photo you’re looking for, and we’ll present a list of options for you to choose from. Select the one that resonates the most with your vision.
Step 5: GENERATE READY LAYOUTS IN JUST ONE CLICK
One-Click Layouts:
Once your photos are in place, prepare to be amazed! With just one click, our lightning-fast generator will create stunning layouts. The best part? You can experiment with unlimited layouts, each offering a beautiful and artistic arrangement. We’ve spent countless hours perfecting our generator to bring you the most visually appealing results with the least effort. It automatically arranges your photos in a captivating gallery style, where they slightly overlap for that perfect, aesthetically pleasing look. Feel free to explore as many options as you like – just be sure to save the layouts that wow you the most!
Three Extra Tips for You:
- Remember, the first photo is always the one in the middle of the board.
- You can seamlessly swap individual photos inside the panel without disrupting the rest of the layout.
- Save Your Progress: Don’t forget to save your layout once you’re happy with it! You have 5 slots to save your designs, and no registration or logins are required. Just return to the same device if you need to finish later.
You can add your new vision board to the cart now or continue fine-tuning your photos in the next step.
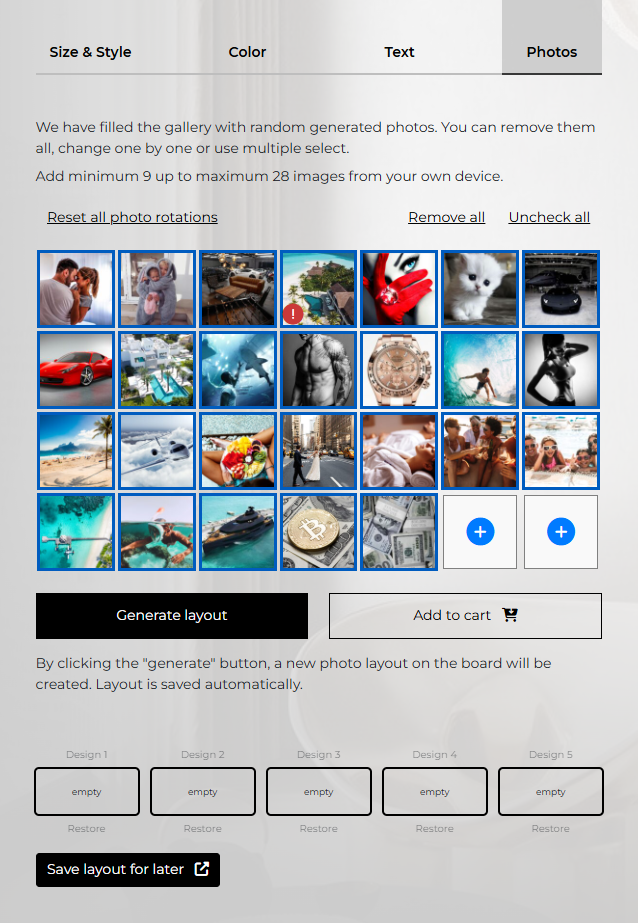
Photos:
Remember to choose high quality esthetic photos.
Try to choose 70% of the photos in standard landscape photos, 20% in portrait and 10% square for the best results.
Try to choose photos with similar tone if possible for the best esthetics.
First photo (Style 1) or First and second photo (Stye 2) always stays the same place
You can easily swap photos by dragging one onto another in the panel without disrupting the layout.
Save up to 5 completed boards and resume at any time – no registration or login required.
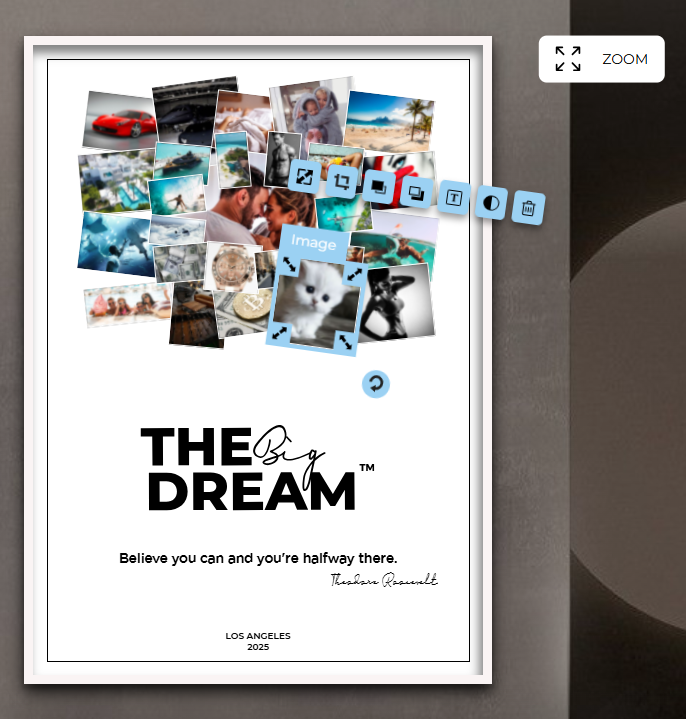
Step 6: FINAL TOUCHES – PERFECT YOUR VISION BOARD
Now that your layout is ready, it’s time to add those final touches!
This step allows you to fine-tune every detail. Adjust photos, move elements around, or add any last-minute changes. You can easily change or delete photos, rotate images, or add text to your photos with no issues. If needed, you can also bring photos to the front or send others to the back with just a click.
For even easier fine-tuning, you can enter Zoom Mode by clicking the icon in the upper right corner. This will take you to full-screen mode, making it simple to make precise adjustments and perfect every detail.
Take your time to ensure everything is perfect, and make sure your vision board truly reflects your dreams and aspirations. Keep refining it until you’re completely satisfied with the result!
Final Touches:
Click on the photo to resize, trim, add text, delete, rotate or send photos backward/forward
Click on zoom to enter full screen mode
TIME-SAVING INNOVATION AT ITS BEST
Life moves fast, and we understand that your time is valuable. With The Big Dream, you’re not just creating a vision board—you’re taking powerful steps toward your goals. Focus on your dreams, and let us handle the rest. Turn your vision into reality, faster and easier than ever before.